Top Social

Picture Life

with embellishments...and rain drops!

Image Slider

Quick Quotes Blog

Back to School Lunch Box

Friday, August 28, 2015
Hello all! It's me Alexia back here with you again today with another back to school project using Craftwell and Xyron products! This time I created this lunch box filled with treats for school teachers or friends.

Would you like some of these....?! Good news, I will provide the svg file to create this lunch box!


Here is how it's created:


Picture above is illustrated in step-by -step tutorial below:

1. Cut out the lunch box using the svg file provided
2. Fold along dotted lines and glue all the flaps to form result in Step 3 below
3. You should have a top and a bottom piece for the box for this step as shown in picture
4. Cut strips of patterned paper that is the width of the bottom and cover piece for the lunch box and run them through Xyron Sticker Maker.
5. Adhere strips of patterned paper around the cover and bottom of lunch box accordingly
6. Punch two 1" circles and fold in half (this is to create the join for the two pieces created in Step 3)
7. Adhere first half of the circle to the inside of the cover piece
8. Adhere the second half of the circle to the bottom part of lunch box


9. Cut out tags, labels and sentiments with Cut 'n' Boss and run them through Xyron Sticker Maker. Embellish lunch box.
10. Attach handle for the lunch box (you should have this cut-out from the same svg file in Step 1)

And here it is...lovely lunch box is ready to go! I hope you like this project and don't forget to grab the svg file to make it too!


Thank you so much for stopping by and I hope you have the most wonderful weekend! Happy crafty day! - Alexia

Products Used:

3D Paper Back Pack

Saturday, August 22, 2015
Hello to all my crafty friends! I hope you are having a wonderful day as you continuing on with the day. As we all know the school starts in September (really soon) and I feel sad to think that my son is going to leave me for most of the day (although "Yea" to more crafting time for me but "Boo"....no more crafting time together with him!). Today he created this project with me, he helped me to glue the patterned paper on this cute little back pack. Isn't he the sweetest?! :)


How do you like this adorable back pack that you can load plenty of stationery for back to school as a gift to teachers? I made this cut file in two versions, one is smaller and the other one is larger. For the instruction to create this back pack "box", I have the tutorial for you below.

The project shown above is created with the larger file, so you'll need 2 sheets of Esse Card Stocks.

Grab the cut file from the bottom of this post, here is what you should get on your silhouette designer screen. "Ungroup" the image and cut the file separately with each of the Esse card stock.

Here is the result from the cutting:


Next you are going to assemble the two cut-outs together. Refer to the picture above, fold along line where it labels A on the first cut-out and adhere to the second cut-out where it labels B.

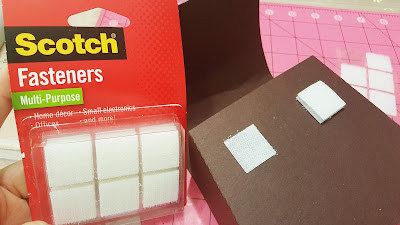
After that, cut patterned paper to the shape of the back pack and adhere them to the back pack. I used Velcro for the snaps, you can get this at Staple or Amazon.


I also created this small pocket for the front of the back pack and it actually hold stuff! Not just an embellishment. :)

Finally I hot glued the button to the front of the back pack cover to make it looks like a button opening back pack.

There it goes!

And yes, I can't help but to embellish the straps with punched out stars! Aren't they cute?! LOL


That's all you need to make someone happy about going back to school, teachers or students they all need a little treat sometimes. :) I hope you enjoy this last project of mine. I look forward to sharing with you all my projects again in the future, or you can follow my blog here. I  greatly appreciate your time.

Have the most wonderful day and never stop creating!

P/S: And don't forget, the ESSE card stock is on sale! :)

Download Cut File: Small Back PackLarge Back Pack

CutCardStock Products Used:
 

First Day Of School Sign

Friday, August 21, 2015
It's the time of the week again, Happy Thursday everyone (one more day till TGIF)! I hope you are geared up to craft this weekend, if you are not already crafting everyday. It's now August which means the school starts next month, how are you feeling about your kids going back to school? My son is entering Kindergarten this year, I'm sure I will be missing him a lot while he is at the school. 

I created this First Day Of School Sign to help capture this moment of sweet (and bitter) memories. He seems excited to go back to school but I'm not too sure how well he will to handle it when he is actually there. Anyway, here it is...he is my precious boy!

It's Craftwell and Xyron partnering month so you will be seeing a lot of projects created using the products from both of the companies. Sweet!! 


To make this sign I create a template for what I want to display on the sign, print it out and cut them into strips. I then arrange and adhere them to the 12 x 12 patterned card stock.


I designed and cut some tree, apples and school bus images on my silhouette designer and embossed the tree with Craftwell's embossing folders.


Applying adhesives to the little apples I cut out using my Xyron sticker maker and sanding the top part of the tree with Core'dinations sanding block


After putting everything together, here is how it looks like! I love the texture of the embossed apple tree.


Products Used: 

I hope you enjoy this project! Have a wonderful weekend everyone! 

Waterproof Name Tags for School

Saturday, August 8, 2015
It's Friday again, happy TGIF!! I'm glad to be here to share a project with you before the weekend starts! As you know the school commence in September and my eldest will start his Kindergarten too. I'm pretty excited for him, this is not only his first experience but mine too (as a mom). So I created this name tags for my son, Jonathan.

I have finally shopped everything on the list and got the name tags ready! 


First I printed few names on a Esse white card stock and die-cut it with a stitched frame die.

Embellish the cut-out name tags

Using my Cameo, I cut out the base for the name tags on a brown Esse card stock

Adhere white name tag to the base

This is how it looks like

Insert result from above to a laminate film 


Run it through laminator

Punch hole on the name tags and insert ring

That's it! Easy peasy! I hope you like this project, the good thing about this name tag is it's waterproof! Check out the Esse card stock today, they are on sale right now, I love the texture on the card stock it's so beautiful!

I hope you have a fabulous weekend! - Alexia

CutCardStock Products Used:
 

Auto Post Signature

Auto Post  Signature